1. 背景
因为最近一直在研究AIGC,然后就心动的买了一台腾讯云服务器的体验版本,新用户60块钱,可以买15天GPU服务器,然后就一发不能收拾了。为什么不用阿里云?因为阿里云好像没有抓住这波AIGC的红利,也没有搞新用户拉新,所以就买了腾讯云。
为了不浪费这60大洋,我拼命的找业务场景,找应用,搭了stable diffusion的应用后,开启了API调用,然后就在公众号上 给大家提供了 文生图 和 图生图的功能,详见如下视频:
一顿操作猛如虎后,发现腾讯服务器再续费的时候 ,嘿嘿嘿了。
一年竟然要3W多,所以就考虑自己买个台式机,然后在家里跑图,然后就需要把局域网的机器,开放到公网来啦!然后就用到了 FRP。
## 通过下面命令查看架构
arch
或
uname -a
然后再决定具体下载哪一个安装包。

## 下载安装包
wget https://github.com/fatedier/frp/releases/download/v0.49.0/frp_0.49.0_linux_386.tar.gz

## 然后解压
tar -zxvf frp_0.49.0_linux_386.tar.gz
## 文件改个名字
cp -r frp_0.49.0_linux_386 frp
# 把解压出来的文件夹复制到你想要的目录下,为了方便我直接放在用户目录下了,进入该目录
cd frp
# 查看一下文件
ls -a

root@ssevening:~/frp# ls
LICENSE frpc frpc.ini frpc_full.ini frps frps.ini frps_full.ini- frps.ini 文件配置如下:
bind_port = 7777
dashboard_port = 7788
token = pass
dashboard_user = admin
dashboard_pwd = pass
vhost_http_port = 7798
vhost_https_port = 7799
heartbeat configure, it's not recommended to modify the default value
the default value of heartbeat_timeout is 90
heartbeat_timeout = 90
#only allow frpc to bind ports you list, if you set nothing, there won't be any limit
privilege_allow_ports = 2000-3000,3001,3003,4000-50000

#pool_count in each proxy will change to max_pool_count if they exceed the maximum value
max_pool_count = 5

# max ports can be used for each client, default value is 0 means no limit
max_ports_per_client = 0

# authentication_timeout means the timeout interval (seconds) when the frpc connects frps
# if authentication_timeout is zero, the time is not verified, default is 900s
authentication_timeout = 900

# 支持外部访问的域名(需要将域名解析到IP)
subdomain_host = frp.xunl.net- 执行启动服务端。
“`shell
root@ssevening:~/frp# ./frps -c frps.ini
2023/06/14 17:28:30 [I] [root.go:203] frps uses config file: frps.ini
2023/06/14 17:28:31 [I] [service.go:208] frps tcp listen on 0.0.0.0:7777
2023/06/14 17:28:31 [I] [service.go:269] http service listen on 0.0.0.0:7798
2023/06/14 17:28:31 [I] [service.go:284] https service listen on 0.0.0.0:7799
2023/06/14 17:28:31 [I] [service.go:320] Dashboard listen on 0.0.0.0:7788
2023/06/14 17:28:31 [I] [root.go:212] frps started successfully
“`
然后访问:http://xxx.xx.xx.xx:7788/ 进入后台。
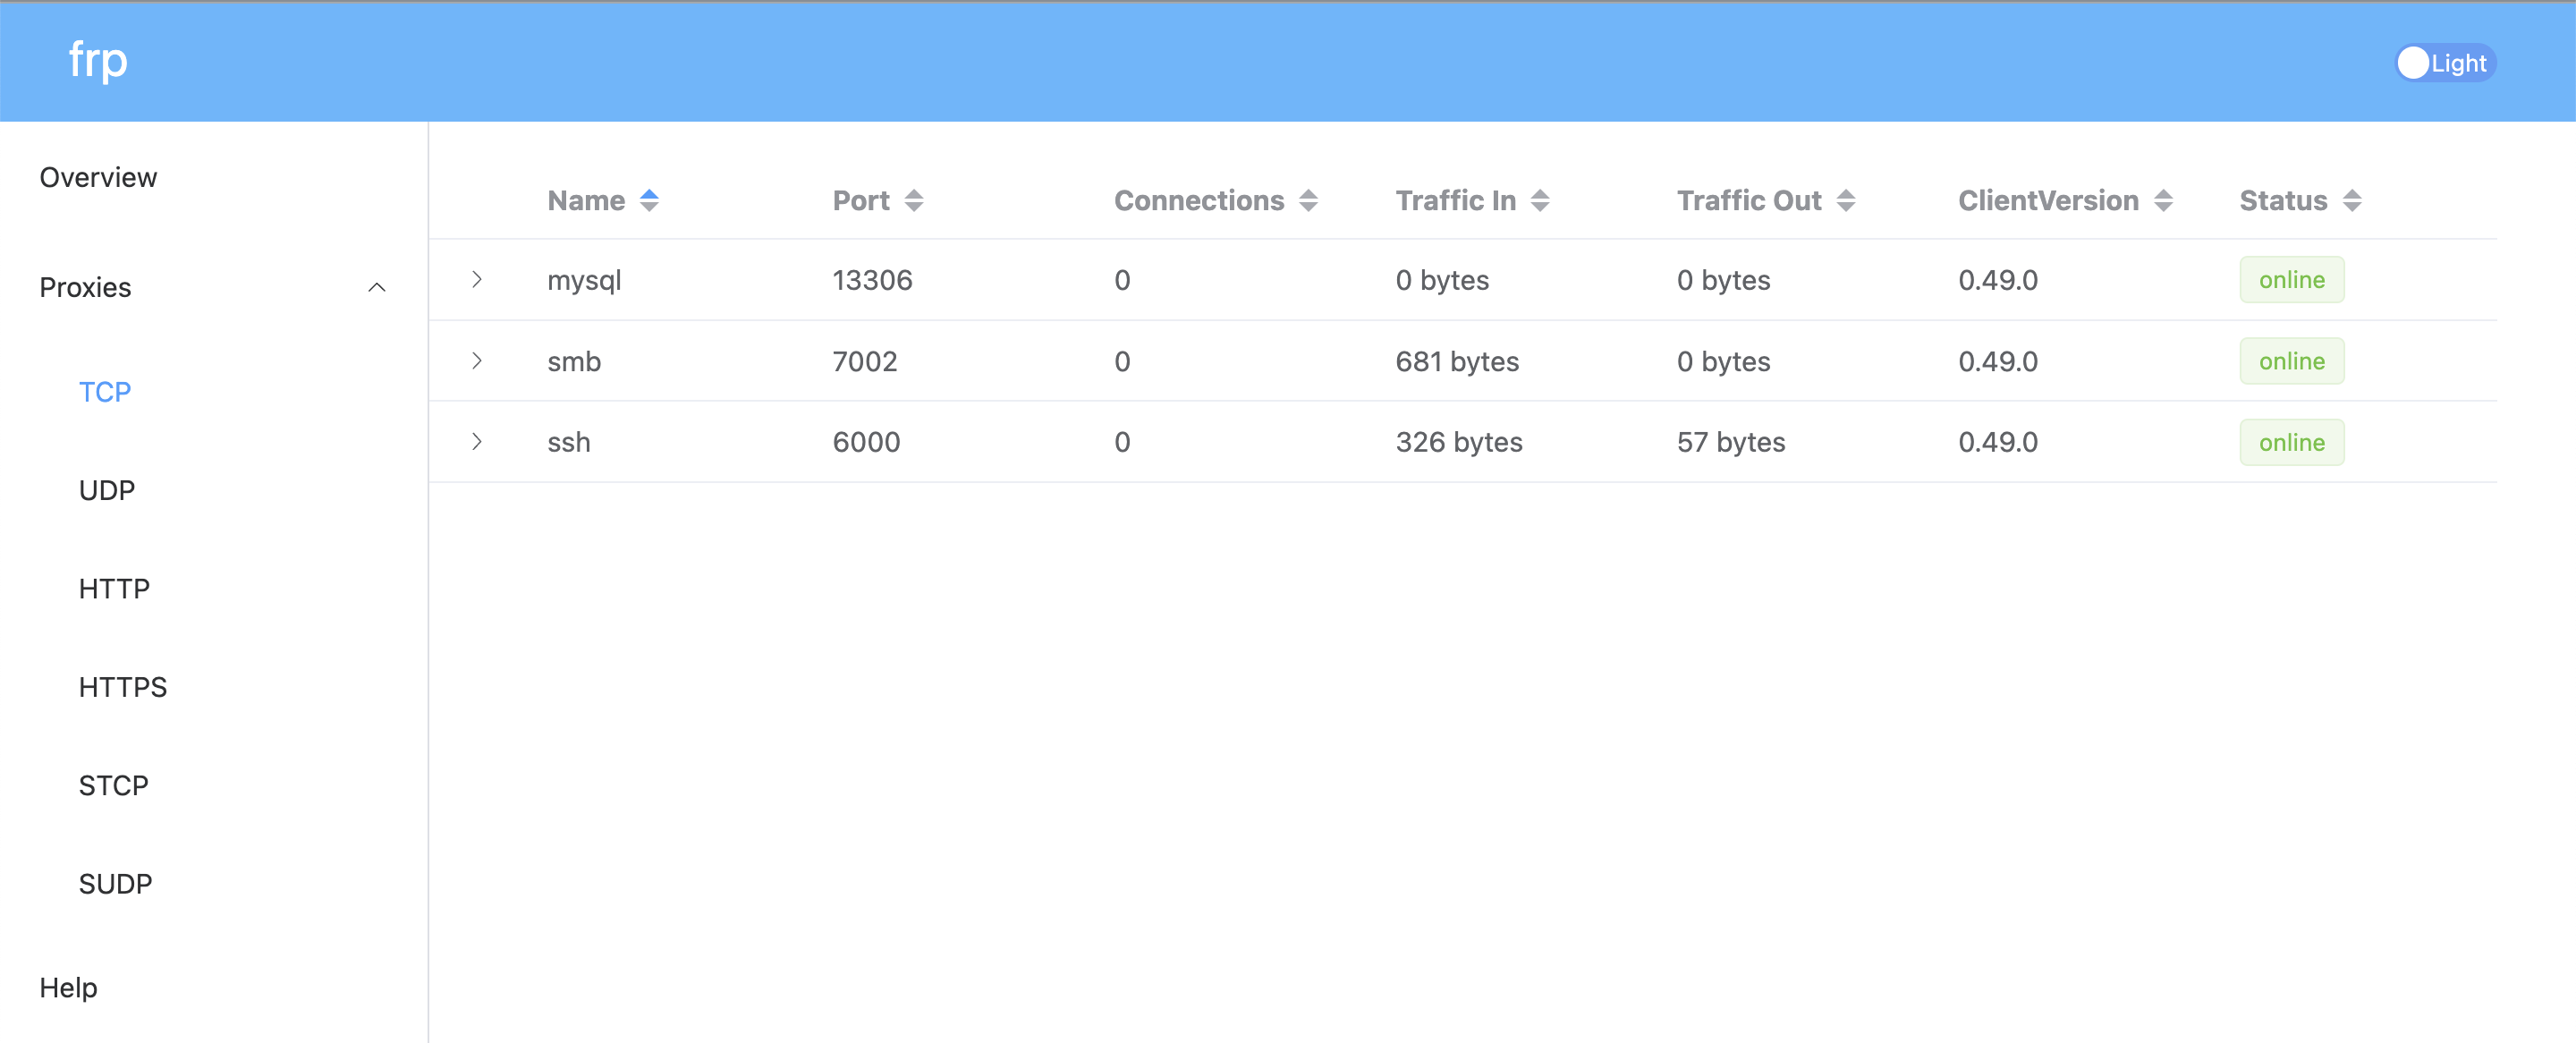
这样服务端就算Ok了。
然后我们日后要后台运行。
nohup ./frps -c frps.ini &下面我们搞MAC M1端
curl https://github.com/fatedier/frp/releases/download/v0.49.0/frp_0.49.0_darwin_arm64.tar.gz

或从这里下载:
https://xunlapk.oss-cn-hangzhou.aliyuncs.com/frp_0.49.0_linux_arm64.tar.gz

unzip frp_0.49.0_darwin_arm64.tar.gz
curl https://github.com/fatedier/frp/releases/download/v0.49.0/frp_0.49.0_darwin_arm64.tar.gz
或从这里下载:
https://xunlapk.oss-cn-hangzhou.aliyuncs.com/frp_0.49.0_linux_arm64.tar.gz
unzip frp_0.49.0_darwin_arm64.tar.gz
编辑 frpc.ini
内容如下
server_addr = 47.88.13.20
server_port = 7777
token = 你的密码
[rdp]
type = tcp local_ip = 127.0.0.1 local_port = 3389 remote_port = 7001
[smb]
type = tcp local_ip = 127.0.0.1 local_port = 445 remote_port = 7002
[https-@.sample.cn]
type = https # 填写实际域名 custom_domains = sample.cn plugin = https2http plugin_local_addr = 127.0.0.1:80 # HTTPS 证书相关的配置 plugin_crt_path = ./sample.cn.pem plugin_key_path = ./sample.cn.key plugin_host_header_rewrite = 127.0.0.1 plugin_header_X-From-Where = frp
./frpc -c frpc.ini
ssh -oPort=6000 pcx@47.88.13.20
当然 https 的实现,也可以用 nginx 中搞证书,然后映射到 本地的 其他端口。和 阿里云 ECS 服务器 通过 nginx域名分发 配置多个wordpress 博客 的原理一样。
source:https://sspai.com/post/52523
然后开始搞活。
- 备份和恢复数据库
- “`bash
echo “23. 连接远程mysql: mysql -h rm-rj9628l24688h63l8125010.mysql.rds.aliyuncs.com -u smartshop -p”
echo “24. 导出mysql: mysqldump -h rm-rj9628l24688h63l8125010.mysql.rds.aliyuncs.com -u smartshop -p wordpress > /root/ssevening.sql —-HelloSmart”
echo “25. 导入mysql: /usr/local/mysql/bin/mysql -h 127.0.0.1 -u root -p wordpress < ~/ssevening.sql”
echo “26. 连接本地mysql /usr/local/mysql/bin/mysql -h localhost -u root -p”
“`
1.报错ERROR 3546 (HY000) at line 24: @@GLOBAL.GTID_PURGED cannot be changed: the added gtid set must not overlap with @@GLOBAL.GTID_EXECUTED时,运行reset master;命令后重启mysql
- docker 访问宿主机mysql
用 host.docker.internal 这个 Hosts
既然已经成功下载并进入了 frp_0.60.0_linux_amd64 目录,那我们继续剩下的配置和安装步骤。
此时,你可以通过输入 ls 命令,会看到里面有 frps(服务端程序)和 frpc(客户端程序),以及它们对应的 .toml 配置文件。因为你是要搭建服务端,所以我们只需要关注带 s(Server)的文件。
以下是接下来的具体操作:
第一步:修改服务端配置文件
使用 nano 编辑器打开服务端配置文件:
nano frps.toml把里面的内容清空,或者直接修改为以下基础安全配置(直接复制右侧内容粘贴进去):
# frps.toml
bindPort = 7000           # 服务端与客户端通信的端口,默认7000即可

# 【强烈建议】设置 Token 鉴权,防止你的服务器被别人恶意连接
auth.method = "token"
auth.token = "请设置一个复杂的密码"

# 可选:如果你以后想用这台服务器做网站的仪表盘/网页穿透,可以加上以下配置
# vhostHTTPPort = 8080

# 可选:开启 frp 后台管理面板(可以通过浏览器查看连接状态)
webServer.addr = "0.0.0.0"
webServer.port = 7500
webServer.user = "admin"
webServer.password = "设置你的面板登录密码"提示:在 Nano 编辑器中,修改完成后,按下 Ctrl + O 然后回车保存,再按下 Ctrl + X 退出编辑器。
第二步:将 frp 移动到系统目录(规范化管理)
为了方便管理,并且让系统服务能够正常调用,我们将可执行文件和配置文件移动到 Ubuntu 的标准系统目录下:
# 1. 把服务端执行文件复制到 /usr/bin/ 目录下
cp frps /usr/bin/

# 2. 创建一个系统配置目录,并将配置文件复制进去
mkdir -p /etc/frp
cp frps.toml /etc/frp/
第三步:配置开机自启(systemd 服务)
为了让 frp 在后台稳定运行,并且在服务器重启后能自动启动,我们为它创建一个系统服务:
nano /etc/systemd/system/frps.service在弹出的空白文件中,直接粘贴以下内容:
[Unit]
Description=Frp Server Service
After=network.target

[Service]
Type=simple
User=root
Restart=on-failure
RestartSec=5s
ExecStart=/usr/bin/frps -c /etc/frp/frps.toml

[Install]
WantedBy=multi-user.target保存并退出(Ctrl + O 回车,Ctrl + X)。
第四步:启动 frp 服务
现在,你可以用 Ubuntu 的服务管理器来启动它了:
# 1. 刷新系统服务列表
systemctl daemon-reload

# 2. 启动 frps 服务
systemctl start frps

# 3. 设置开机自动启动
systemctl enable frps
第五步:检查是否成功运行
输入以下命令查看 frp 的运行状态:
systemctl status frps如果看到输出中有一行绿色的 active (running),说明你的 frp 服务端已经完美在后台运行了!
⚠️ 最后一步(至关重要):放行云服务器防火墙
从你的系统用户名 root@iZrj990c... 来看,你使用的是阿里云的服务器。
你必须登录阿里云控制台,进入该 ECS 实例的**“安全组”**页面,添加方向为“入方向”的访问规则,放行你在配置文件里写好的端口:
- 放行 TCP: 7000(客户端连接必须)。
- 如果你开启了面板,放行 TCP: 7500(网页管理面板)。
- 以后你在客户端(frpc)里映射了什么远程端口,也都需要在阿里云安全组里放行对应的端口。
服务端至此就全部搞定了!你接下来是需要配置客户端连接,还是在安全组设置上有什么疑问?
个人微信:ssevening